
New to Dynamo?
Watch this video for the fast intro.
Watch this video for the fast intro.

An introductory resource for beginners and a long-term reference. See this structured explanation of everything from data management to computational geometry and working with Revit.

![]()
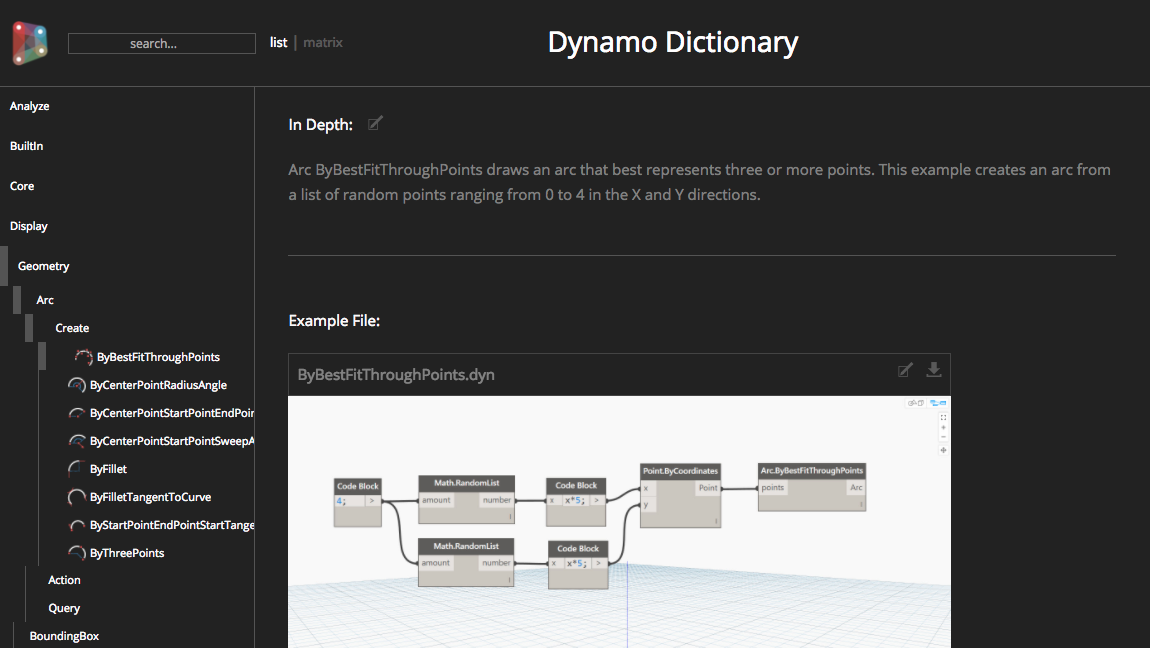
A community powered, comprehensive reference to the functionality and utility of every node in Dynamo. Use the Dynamo Dictionary as a quick reference or an in-depth guide to extend your skills and empower your graphs.
![]()
Dynamo hosts a thriving ecosystem for Development. This page takes you down the rabbit hole of all of the tools available for customizing your Dynamo experience. From top-to-bottom, we’ll start with the ‘out-of-the-box’ options and go deeper as we progress down the page.

The Introductory Tutorial videos reflect the visually refreshed Dynamo from versions 2.13 onwards, including new graph authoring features. If you are using Dynamo versions 2.0 to 2.12, then please refer to our Introduction to Dynamo (2.0 to 2.12) Youtube playlist.
In this course, we will provide an in-depth overview of Dynamo, a visual programming plugin for designers. We'll look at the node system and interoperability workflows to integrate computational design capabilities into your design workflows.
In this lesson, we will take a closer look at the specific elements used to create a Dynamo graph. By the end of this lesson, you will have an understanding of the components that comprise a Dynamo graph, the basics of defining an algorithm, and what it means to map together nodes to update results.
In this lesson, we're going to cover annotation strategies for your Dynamo graph. Annotating and cleaning up Dynamo graphs is a very important part of your Dynamo workflow. Specifically, if you're looking to share your graphs with anyone else, you want to be very clear and concise as to what your graph is doing.
In this lesson, we're going to take a look at additional ways of cleaning up and documenting our Dynamo graphs.
By the end of this lesson, you're going to learn ways to interact with the wires of a Dynamo graph and take a look at further documentation strategies for serializing properties within our Dynamo graphs.
In this lesson, we will discuss the basic concepts of creating and working with lists in Dynamo. In Dynamo, we can have lists that contain data of varying lengths and depths.
By the end of this lesson, you will have an understanding of list structure in Dynamo, you'll know how to create a list of points, and you'll have an understanding of what lacing is
In this lesson, we will explore concepts for how to manipulate lists and nested lists in Dynamo.
By the end of this lesson, you'll have an understanding of what a nested list is and how to obtain items within a nested list.
In this lesson, we're going to cover topics to create a graph with computational logic using an attractor algorithm. While an attractor algorithm sounds intimidating, it is simply a mathematical approach to driving geometry by proximity to any given point that is considered an attractor point.
By the end of this lesson, you will reinforce your understanding of lacing, learn how to create an attractor algorithm, and learn new ways to interact with Dynamo geometry.
In this lesson, we will look at the power behind connecting Dynamo within Revit to an external program, such as Excel, to be able to extract and manipulate data from the Revit environment.
By the end of this lesson, you will have an understanding of how to collect Revit room data, how to prepare the data for export, and strategies for ensuring data remains consistent for the import process at a later time.
In this lesson, we will cover strategies for reading data from Excel and relating it to Revit elements. Specifically, we're going to read corrected room names and update the related rooms in Revit.
By the end of this lesson, you will know how to read Excel files with Dynamo, select Revit elements by their element ID, and update Revit element parameter values.
In this lesson, we will look at code blocks in Dynamo. Code blocks are a unique feature in Dynamo that brings together visual programming with DesignScript.
DesignScript is a text-based language for computational design. By the end of this lesson, you will know how to use code blocks for numerical entry, string entry, and sequence and ranges.
The Advanced Tutorial videos are legacy content that has been created for the Dynamo 1.X environment. Some of the nodes you will see in these videos have been changed or deprecated in subsequent releases. These legacy videos are posted here for educational purposes only and we have no plans to update any of these to the Dynamo 2.X environment.
Create custom functionality to reuse it.
Note: This video uses Dynamo inside of the Revit application, but the workflow's logic can be applied to any other application environment.
In this lesson we will introduce the building mass for the course, demonstrate its parametric flexibility, and explain the geometric applications of its parameters. This introduction will be entirely in Revit.
In this lesson we will introduce the building mass for the course, demonstrate its parametric flexibility, and explain the geometric applications of its parameters. This introduction will be entirely in Revit.
In this lesson we will edit building mass parameters from within the Dynamo environment. Run Automatically will be checked so the user can visualize a range of building mass options.
In this lesson we will edit multiple parameters for the building mass in dynamo. In order to do this properly, we’ll introduce lists into our workflow. Lists will be a critical focus for the remainder of the lesson.
In this lesson we will set several parameters for our building mass in Dynamo. Without geometric constraints explicitly defined in the mass family, we will introduce numerical constraints to create new parameters. Formulas and conditional statements will also be introduced.
In this lesson we will introduce Dynamo’s basic tools for adding Structural Framing Elements to a Revit document. The end result will be a linear array of beams across the atrium of our building mass. Part 1 of 2.
In this lesson we will introduce Dynamo’s basic tools for adding Structural Framing Elements to a Revit document. The end result will be a linear array of beams across the atrium of our building mass. Part 2 of 2.
In this lesson we will introduce Dynamo’s family by point node. The end result will be a two-dimensional array of photovoltaic panels on the roof of our building. Part 1 of 3.
In this lesson we will introduce Dynamo’s family by point node. The end result will be a two-dimensional array of photovoltaic panels on the roof of our building. Part 2 of 3.
In this lesson we will introduce Dynamo’s family by point node. The end result will be a two-dimensional array of photovoltaic panels on the roof of our building. Part 3 of 3.
In this lesson we will introduce Dynamo’s Adaptive components by point node. The end result will be a series of vertical trusses along a doubly skinned façade system. This will take a closer look at plane/solid intersection and list management. Part 1 of 2.
In this lesson we will introduce Dynamo’s Adaptive components by point node. The end result will be a series of vertical trusses along a doubly skinned façade system. This will take a closer look at plane/solid intersection and list management. Part 2 of 2.
In this lesson we will use the Set Parameter Node to parametrically control a level in our Revit Project. We’ll refer to the great potential behind using Dynamo to control documentation sets, views, and sheets. Dynamic level adjustment will show changes in the 3D model, as well as sheet adjustments with automated visibility settings. Part 1 of 2.
In this lesson we will perform geometric operations on imported SAT files with Dynamo. A complex surface will be introduced to the Revit project, and we will use Dynamo to create a rationalized waffle grid from the shape. Bounding box operations and plane intersections will be dealt with on a more in-depth level. Part 1 of 3.
In this lesson we will perform geometric operations on imported SAT files with Dynamo. A complex surface will be introduced to the Revit project, and we will use Dynamo to create a rationalized waffle grid from the shape. Bounding box operations and plane intersections will be dealt with on a more in-depth level. Part 2 of 3.
In this lesson we will perform geometric operations on imported SAT files with Dynamo. A complex surface will be introduced to the Revit project, and we will use Dynamo to create a rationalized waffle grid from the shape. Bounding box operations and plane intersections will be dealt with on a more in-depth level. Part 3 of 3.
In this lesson we will use the geometry created in the prior tutorial and export it to an external SAT file. We will also use a similar operation to import from Dynamo directly into the Revit environment, using the Instance By Geometry node.
In this lesson we will show how to import SATs file directly into your Dynamo or Revit environment. Referencing these file types allows us to create a fluid workflow between Revit and other programs.
Arguably the most important lesson about interoperability, this tutorial will show how to import Excel data into Dynamo to array adaptive components. Part 2 of 4.
Arguably the most important lesson about interoperability, this tutorial will show how to import Excel data into Dynamo to array adaptive components. Part 2 of 4.
Arguably the most important lesson about interoperability, this tutorial will show how to import Excel data into Dynamo to array adaptive components. Part 3 of 4.
Arguably the most important lesson about interoperability, this tutorial will show how to import Excel data into Dynamo to array adaptive components. Part 4 of 4.
This lesson will introduce users to the image sampler, and use a sampled image’s brightness to set parameters and override colors in view. Part 1 of 2.
This lesson will introduce users to the image sampler, and use a sampled image’s brightness to set parameters and override colors in view. Part 2 of 2.
This lesson will expand on overridden colors in a Revit view and will look at analysis of panels on a doubly curved surface. The user will learn how to color code a panel based on area or plane deviation.
This lesson will focus on writing Panel Deviation values to excel to complete the feedback loop. Geometry is generated from Excel data, analyzed in Dynamo, and then written back to Excel.
This lesson will focus on preliminary analysis of panel orientation relative to the sun at a given point in time.
This lesson will take the power of the code block a step further. A complicated Dynamo graph from earlier in this course will be reduced to a few code block nodes, using Design Script and functions. Part 1 of 2.
This lesson will take the power of the code block a step further. A complicated Dynamo graph from earlier in this course will be reduced to a few code block nodes, using Design Script and functions. Part 2 of 2.
The final lesson in this series will use Python to create basic conditional statement within a loop function.